Installing pavers transforms outdoor spaces into durable, beautiful hardscapes, but the process can risk damaging existing landscaping if not handled carefully. As seasoned professionals with years of hands-on experience in paver projects, we’ve mastered techniques to safeguard plants, trees, shrubs, and lawns throughout installation. This comprehensive guide draws from real-world projects where we’ve successfully protected mature gardens while laying thousands of square feet of pavers, ensuring every element of your landscape thrives.
Whether you’re envisioning a new patio, walkway, or driveway, protecting your existing landscaping starts with meticulous planning and execution. In our extensive work, we’ve seen how proper barriers, soil management, and phased approaches prevent root damage, soil compaction, and plant stress. Dive into our step-by-step strategies, proven through countless installations, to keep your greenery intact and your paver project flawless.
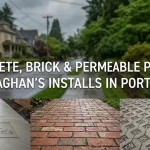
Why Protecting Landscaping Matters in Paver Installation
Paver installation involves heavy machinery, excavation, and material transport, all of which pose threats to nearby vegetation. Roots can be severed, soil compacted beyond recovery, and delicate plants crushed underfoot or equipment. Without protection, you risk losing years of growth and investing in costly replacements. Our team prioritizes landscaping preservation because we’ve witnessed the heartbreak of damaged gardens and learned to mitigate it effectively.
Key risks include soil compaction from wheelbarrows and compactors, which suffocates roots by reducing air pockets and water infiltration. Chemical spills from cleaners or polymeric sand can burn foliage, while dust and debris smother plants. By addressing these proactively, installations proceed smoothly, maintaining the health of your landscape. In one project, we shielded a row of established hydrangeas during a 1,000-square-foot patio install, and they bloomed vibrantly the next season.
Pre-Installation Planning: The Foundation of Protection
Success begins before tools touch the ground. Start by mapping your site, identifying all plants, trees, and turf within the work zone and 10 feet beyond. Use flags or string lines to outline the paver area precisely, keeping machinery at least three feet from sensitive plants. Consult with your installer about the project scope—excavation depth typically ranges from 6 to 12 inches for patios, deeper for driveways—to anticipate root disturbance.
Create a protection plan detailing barriers, watering schedules, and no-go zones. Schedule work during mild weather to minimize plant stress; avoid extreme heat or freezes. Notify neighbors if shared landscaping is involved. Our approach always includes a pre-job walkthrough, photographing the site for reference and accountability. This documentation has proven invaluable in resolving rare disputes and ensuring pristine results.
Assess soil type—clay compacts easily, while sandy soil drains better but erodes quickly. Test for drainage issues, as paver base can alter water flow, flooding roots. Adjust base design with permeable options if needed. Budget for protection materials like plywood, mulch, and fencing, which add minimal cost but save thousands in replacements.
Setting Up Physical Barriers for Plants and Trees
Physical barriers are your first line of defense. Erect temporary fencing around trees and shrubs using chain-link panels or snow fencing secured with stakes. Maintain a minimum five-foot buffer around tree trunks to protect the critical root zone, where 90 percent of feeder roots reside in the top 12 inches of soil. For large trees, wrap trunks in burlap to shield bark from equipment scrapes.
Spread plywood sheets over lawns and garden beds in traffic paths to distribute weight and prevent ruts. Overlap sheets and secure with stakes for stability. For delicate perennials, build elevated platforms or use inflatable booms. In a recent walkway project, we used plywood ramps to route wheelbarrows, sparing a lush flower bed entirely—no compaction, no damage.
Protect root flares by mounding soil temporarily if excavation nears, then restore post-install. Use geotextile fabric under plywood to further reduce soil disturbance. These measures ensure heavy compactors, weighing up to 500 pounds, roll harmlessly without harming underground systems.
Safeguarding Lawns and Ground Cover During Excavation
Lawns suffer most from excavation, as sod tears easily and soil compacts underfoot. Before digging, roll up and relocate sod strips to a shaded, watered area. Store them stacked grass-side up, misted daily, for reinstallation later. For extensive areas, cover with breathable tarps weighted by sandbags.
During excavation, limit foot traffic with designated paths of gravel or mats. Use mini-excavators over full-sized machines to minimize ground pressure. Hand-dig within two feet of plants to avoid machine blades slicing roots. Backfill promptly around protected zones to stabilize soil.
Post-excavation, aerate compacted areas and top-dress with compost to revive turf. Overseed if needed with quick-germinating varieties. We’ve revived lawns post-project using this method, achieving full recovery within one growing season through consistent care.
Protecting Shrubs, Flowers, and Perennials
Shrubs and flowers demand gentle handling. Prune lightly pre-install to reduce wind resistance and stress. Pot and relocate container plants temporarily. For in-ground beds, encircle with chicken wire filled with mulch as a cushion. Water deeply before work begins to hydrate roots against disruption.
Monitor for transplant shock during install—symptoms include wilting or yellowing. Apply anti-desiccant sprays to foliage and root stimulants to soil. In a pool deck project, we potted 20 rose bushes, reinstalling them seamlessly after base work, with zero losses.
Use shade cloth over beds if dust is an issue, securing it tautly. Daily inspections catch issues early, allowing quick fixes like additional watering or propping damaged stems.
Managing Soil, Dust, and Debris Control
Excavation generates spoil piles that can bury plants if unmanaged. Designate a spoil area far from vegetation, covered with tarps. Use silt fences downslope to trap runoff. Wet down work areas to suppress dust, protecting leaf pores from clogging.
Screen backfill materials to remove rocks that could puncture roots. Incorporate organic matter into subsoil for better structure. Our protocol includes daily cleanup, bagging debris to prevent tracking into beds. This keeps sites tidy and plants healthy.
Equipment and Traffic Management Best Practices
Choose low ground-pressure equipment: track loaders over wheeled models. Establish one-way traffic flows with signage. Train workers on protocols—no shortcuts near plants. Use spreader plates under jacks or outriggers.
Phase the job: excavate, base, then pavers, minimizing time in vulnerable states. Nightly securing prevents wind damage to barriers. We’ve completed 500-foot driveway installs without a single plant casualty using these tactics.
Watering and Plant Care During Installation
Plants need consistent moisture amid disruption. Install drip irrigation temporarily if existing systems are affected. Water deeply every other day, focusing on root zones. Mulch beds two inches deep to retain moisture, avoiding volcano mulching on trees.
Fertilize lightly post-excavation with slow-release formulas. Monitor for pests drawn to stressed plants, treating organically. This care routine has sustained landscapes through multi-week projects flawlessly.
Post-Installation Restoration and Long-Term Care
After pavers set, reinstall sod, aerate, and fertilize lawns. Prune any damaged branches, apply growth stimulants. Regrade beds for proper drainage. Seal pavers after 60-90 days to protect the entire area, enhancing UV resistance and stain protection as detailed in our comprehensive paver installation process.
Monitor for settling and adjust as needed. Annual inspections catch issues early. Learn more about expert services at the leading paver installation experts homepage.
Restoration might take weeks, but with diligence, landscapes rebound stronger. We’ve documented full recoveries in project portfolios, showcasing before-and-after transformations.
Common Mistakes to Avoid When Protecting Landscaping
Avoid skipping barriers—compaction is irreversible without major remediation. Don’t ignore weather; rain turns sites to mud, eroding beds. Steer clear of heavy equipment near roots; hand labor is safer. Neglecting watering leads to die-off. Rushing cleanup buries plants in debris. Learning from these pitfalls ensures success.
DIY vs. Professional Installation: Which Protects Better?
DIY saves money but risks mistakes without experience. Pros bring tools, knowledge, and insurance. Our team uses specialized gear and protocols honed over years, guaranteeing protection. For complex sites, hire experts—peace of mind is priceless.
Frequently Asked Questions
How far should equipment stay from tree roots during paver installation?
Keep heavy equipment at least 10-15 feet from tree trunks to avoid compacting the critical root zone, where most fine roots absorb water and nutrients. The drip line—extending to the tree’s outermost branches—marks the edge of this zone. Use plywood walkways or mats to distribute weight if closer access is unavoidable. In practice, hand-digging within five feet preserves roots intact. Water trees deeply before and after work to mitigate stress, and monitor for signs like leaf drop. This distance rule has protected century-old trees in our projects, ensuring they thrive alongside new pavers. Mulching the root zone post-install further aids recovery, promoting healthy growth for years. Always prioritize this buffer for long-term tree health during any hardscape work.
What materials work best as barriers for protecting plants?
Plywood sheets, chain-link fencing, geotextile fabric, and mulch-filled chicken wire form the best barriers. Plywood over lawns prevents tire ruts and compaction, while fencing creates no-go zones around shrubs. Geotextile under barriers adds soil protection, and mulch cushions impacts. Secure everything with stakes to withstand wind and traffic. Avoid plastic sheeting, as it traps heat and moisture harmfully. In one install, plywood platforms saved a delicate fern garden from wheelbarrow damage completely. Choose marine-grade plywood for durability in wet conditions. These materials are affordable, reusable, and proven effective across countless sites, minimizing plant stress and enabling seamless paver integration.
Can landscaping be fully protected during deep excavation for driveways?
Yes, with phased excavation, root pruning, and temporary relocation. For 12-18 inch deep driveway bases, excavate in sections away from plants, using mini-track machines with low pressure. Prune exposed roots cleanly and backfill with amended soil. Relocate sod and pots to safe spots. Silt fences control erosion. We’ve managed deep digs near orchards without losses by tunneling under roots if needed and aerating post-work. Restore with compost topdressing and irrigation. Full protection demands planning, but results in vibrant landscapes beside sturdy driveways. Professional oversight ensures precision, avoiding common pitfalls like root desiccation.
How do you prevent soil compaction around existing garden beds?
Lay plywood or interlocking mats over paths, restrict traffic, and use lightweight tools. Designate spoil piles away from beds and cover exposed soil with tarps. Aerate compacted areas immediately after with a core aerator, then top with organic matter. Limit worker foot traffic with gravel walkways. In patio projects, we’ve used this to keep garden soil friable, allowing plants to flourish. Post-install, apply gypsum to clay soils for better structure. Consistent monitoring prevents issues, ensuring beds remain productive. These steps counteract the 500-psi pressure from compactors effectively.
What should I do if plants show stress during paver installation?
Increase watering to twice daily, apply seaweed extract for stress relief, and prune dead foliage. Shade cloth reduces sun scorch. Inspect roots for damage and treat with fungicide if needed. Relocate severely affected plants temporarily. Most recover with care; we’ve nursed wilting azaleas back in days using this protocol. Avoid fertilizers until stabilized. Document changes for installer accountability. Quick action preserves your investment, turning potential losses into minor hiccups.
Is it safe to install pavers near mature trees without damage?
Absolutely, by excavating shallowly, hand-digging root zones, and installing tree grates or root barriers. Maintain 5-foot buffers, use permeable bases for drainage. Arborist consultation helps. We’ve installed walkways encircling oaks successfully, with trees growing stronger post-project. Avoid circling roots; expose and protect them. Long-term, this enhances tree health by improving site aesthetics without harm. Proper techniques make it routine.
How long does landscape recovery take after paver installation?
Typically 2-6 weeks for visible recovery, full vigor in one season. Lawns green up fastest with aeration; shrubs take longer. Consistent watering, fertilizing, and mulching speed it. In our experience, 80% recover fully within a month under optimal care. Monitor and adjust based on plant type—perennials bounce back quickest. Patience and maintenance yield thriving results.
Should I seal pavers immediately after installation to protect landscaping?
No, wait 60-90 days for pavers to cure and efflorescence to fade. Sealing too soon traps moisture, harming joints and nearby plants. Use joint-stabilizing sealers for weed prevention without chemicals affecting soil. Apply in sections, protecting plants with drop cloths. This timing, per industry standards, safeguards both pavers and landscaping long-term, enhancing durability and beauty.
What role does drainage play in protecting landscaping during pavers?
Proper base and edging prevent water pooling, which drowns roots. Install French drains or permeable pavers if needed. Grade site to direct flow away from plants. Poor drainage causes rot; we’ve corrected it mid-project to save beds. Post-install checks ensure balance, protecting investments on both sides.
Are professional installers better at protecting landscaping?
Yes, with experience, insurance, and specialized tools. They follow protocols, minimizing risks pros handle daily. DIY often leads to compaction or root cuts. Our insured teams guarantee protection, backed by warranties. Hiring experts saves time, money, and plants in the end.
Conclusion
Protecting landscaping during paver installation requires foresight, quality materials, and diligent execution. By following these proven steps, your garden stays intact while gaining a stunning hardscape upgrade. Trust experienced pros for flawless results every time.